Firstly, special thanks goes to Geoff Graham, View Site... for allowing me to use his LCD Backpack board as the centre piece for this exercise.
I intend to show the `basics’ of how to go about entering all of the required data to lay out a PCB, from start to finish, including creating the GERBER files to send to a PCB fabrication house for production. This document will no doubt be full of grammatical and spelling errors and may show methods that are not necessarily the easiest, or best, way to do things. It is the way that I go about using DEX, you may do things differently and that is fine. We are all individuals and we all do things in our own ways. I also make no guarantee about the accuracy of this board and in fact it may have serious errors that will make it useless. What is important is the methodology that I use and if you chose to make any PCBs using this design you do so at your own risk. Of course you can always edit the project to fix said errors, if they rear their ugly heads. One last thing is this will NOT be an exact TRACK for TRACK reproduction, it will lay out as ELECTRA choses to route the board, you can route manually and exactly replicate the original but that would take a lot more effort and is a moot point as generally you will be designing from scratch.
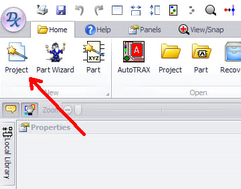
Preparation:
There are a few parts that DEX does not have by default that are required for this project, you can create them yourself or use the ones that I have created for you. Some of these parts are possibly included in DEX’s extensive library but do not have nice 3D which I wanted to use to show a complete board in wonderful 3D.
Parts you will need to get/design (I will post these on The Back Shed forum where I post this document) include the following:
PIC32MX170
TrimPot
Switch Tactile (4pin)
4pin MALE header
18pin MALE header
6pin R/A MALE header
14pin FEMALE header
MCP1700 Voltage Regulator
You will need to put your parts in your DEX parts Library. Create a directory for yourself – I will use bigmik
The library usually stores itself as shown below (I will create a directory called bigmik (in green) in the Library folder and copy the above parts in there. (You can also put subdirectories in your new directory and DEX will find the parts automatically.)
C:\Users\your user name\AppData\Roaming\AutoTRAX Software\DEX\Library\bigmik