Select the PCB work sheet. Earlier, we turned the NET LIST off, we now need to turn it back on. Under the View/Snap key tab there is the NETS toggle, click this to show all the nets (Rat’s Nest).
Close the PART BUILDER panel and open the PROPERTIES panel.
We now want to set track widths for the various NETs and via sizes etc.
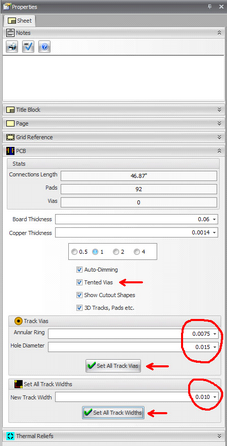
I always use imperial sizes for my tracks and vias so select inches from the top tool bar then click on the work area, away from any objects and you should see, in the PROPERTIES panel, the following settings under the PCB heading.
Change the Via size to annular ring = 0.0075” and hole Dia. 0.01
Click Set all Track Vias.
Change the track width to 0.010
Click Set all Track Widths.
That will probably suffice for this board but I always like to set my power (Vcc, 5V and Gnd) nets to a fatter thickness, (let’s use 0.02”).
A convenient place to get all three of these nets is pins 16, 17 & 18 (the right hand 3 pins) of the 18pin header.
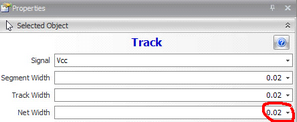
Select each net in turn and change the Net Width setting to 0.02”, as shown below.
That is it, we are ready to route the board now, AutoTRAX DEX uses the Electra router, which is a pretty decent auto router that has many purchase options, but they do have a free (limit of 250 pads) version available for download from The Electra Web Site... This free license will have to be renewed every 100 days but they allow you download the latest version, and use it for another 100 days. Iliya plans to have a new DEX autorouter sometime in future but at this stage Electra does a great job.
Let's have a go shall we?
After you have installed Electra you will need to tell DEX where the install directory is located.
In the ROUTE key tab, you will see a box called `ALL’ in the ROUTE section.
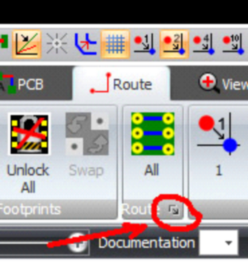
Click the expand arrow on the bottom right of the Route section to change the router settings.
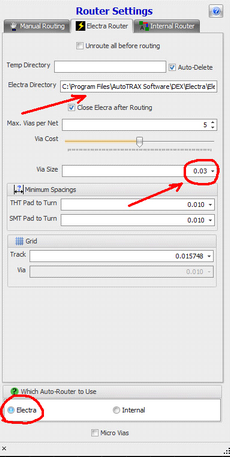
In the router settings dialogue box that opens you will see three key tabs at the very top, select `Electra Router’ and fill in the directory of where you installed Electra and change the via size to be 0.03” Dia.
Also make sure that Electra is set to be the default Auto-Router.
DEX has its own Internal router but at this stage it is really just a `horizontal one layer and vertical the other’ type router and very basic in comparison to Electra.
Iliya (the author) does intend, at some stage, to work on the internal router, but currently, Electra is the best all round option.
When you are happy with your selections just click the `X’ at the bottom Left hand corner to close the router settings dialogue.

Now it is time to route the board, Click on the ALL button in the ROUTE panel
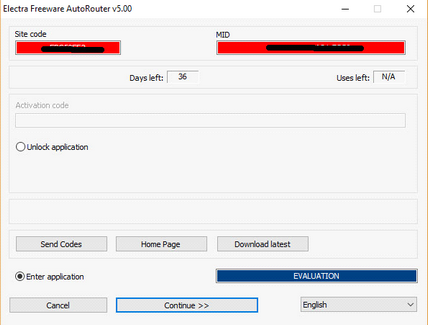
And a licensing information box should open like the picture on the next page.
As you can see I still have 36 days of my 100 days license left, when that expires I need to select the `Download Latest’ button and answer the download questions and I will receive another 100 days use.
As you can see I still have 36 days of my 100 days license left, when that expires I need to select the `Download Latest’ button and answer the download questions and I will receive another 100 days use.
A minor inconvenience for a massive benefit.
(I have blacked out my Site Code and MID just in case this is vital information.)
All you need to do to initiate Electra is click on the `CONTINUE' button. You should see this logo overlay on the screen and within a few seconds your board will be routed.
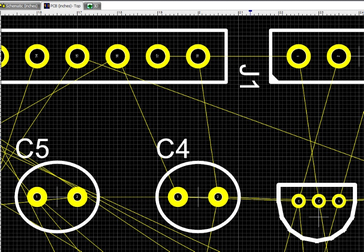
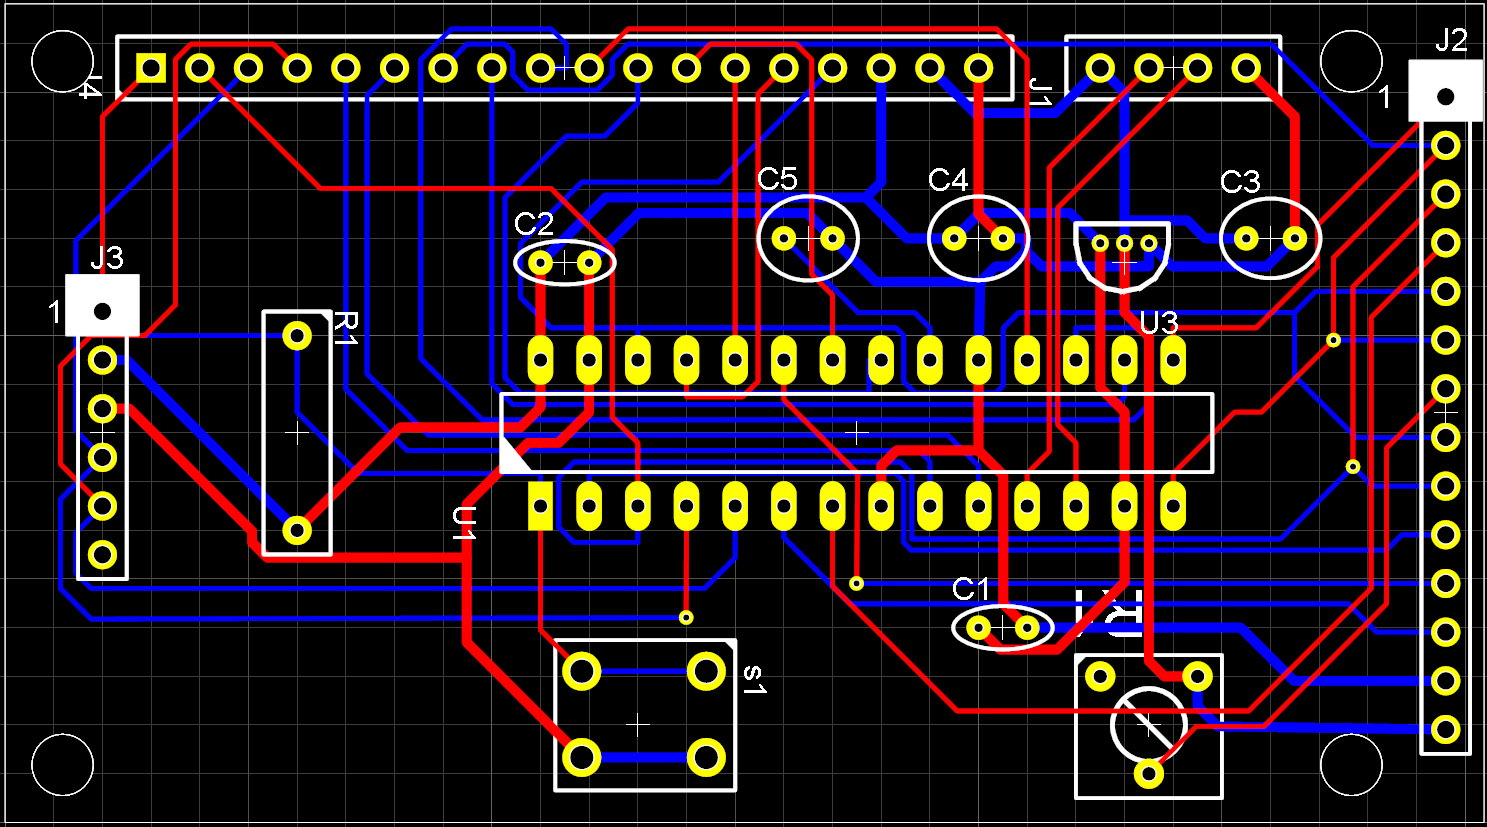
Your PCB should now look like this: (note the Power tracks are all twice as fat as the signal tracks)
That concludes Part 3 – 'Routing the PCB'