Well done to get this far, now your design is complete you still need to generate Gerber files so that your board manufacturer can make them for you.
Thankfully, this task is really very easy in AutoTRAX DEX.
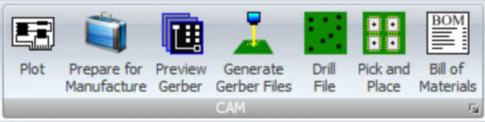
Select the PCB work sheet again, and select to TOOLS key tab from the tool bar, about 2/3 the way across you will see the CAM tools.
Here you can generate all of the files a PCB manufacture requires to make your PCB for you.
Generally all they require are the Gerber files (one for every layer) and a Drill plot file (so they know where to drill the holes and what diameter drills to use).
Click on `Generate Gerber Files’. This brings up the following window.
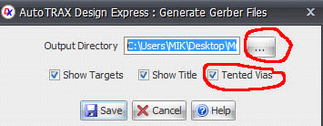
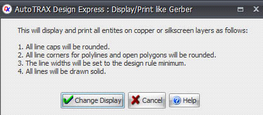
What does it mean? Well when you work it out can you let me know? I always just click `Change Display’, it doesn’t seem to impact my design and it just works. This brings up another dialog box. Select the output directory that you would like your Gerber files saved into and tick the check boxes as shown, Tented Vias means that they are covered by the solder mask and no copper is exposed, this helps silk screen text become more legible when printed over a via. I always use Tented Vias.
Once you select your directory and are happy with the check box settings click save, after a few seconds a window will open with the directory opened with the saved files. We now need to create a drill file, click on the `Drill File’ icon you will be asked for a save directory, navigate to the directory you saved your gerbers into. An information dialog box will open, just click OK for this.
And you are DONE! If you have a look at the directory with windows explorer you will see a list of files like this.
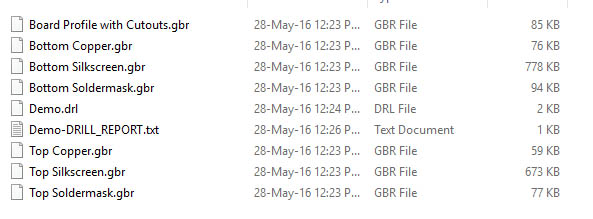
Just zip these files up and send them to your PCB manufacturer and they will produce the circuit boards for you.
That concludes Part 7 – “Gerber files”